
REVIEW · AMSTERDAM
Amsterdam Photography Masterclass – Private Photography Lesson
A camera walk through Amsterdam’s best corners sounds simple. It turns into a private photography masterclass that teaches you how to actually see and shoot the city, from bridges to museums. I love that the instruction is hands-on, not just theory, and I love the way the guide helps you translate your camera into better pictures on the spot. One possible drawback: you bring your own DSLR and you are doing a lot of short stops, so you need to stay focused and move when the guide says move.
You get a real 3-hour plan, with a professional photographer guide plus a local guide, and it stays private for up to four people per booking. That small group size matters, because you can get quick fixes to your settings and composition instead of waiting your turn. If you hate walking, this is still manageable, but it is very much a walking lesson through central Amsterdam.
Even better, you can choose daytime or evening. That means you can aim for crisp canal light in the day or try your hand at tougher conditions when the streets and bridges glow at night. The route also runs in all weather, so you will want to dress for rain or wind and not plan on the lesson being cancelled because the sky is dramatic.
In This Review
- Key Highlights You’ll Feel Right Away
- A Private Photo Lesson Through Amsterdam’s Best Corners
- Price and Value: What $204.24 Buys You in Real Teaching Time
- What to Bring, What to Expect, and How to Not Get Frustrated
- The Route: Nine Stops Where You Learn to Shoot, Not Just Look
- Stop 1: Statue Amsterdams Lieverdje
- Stop 2: Voetboogstraat (and a close-by alley vibe)
- Stop 3: Leidsegracht Bridges
- Stop 4: Rijksmuseum and Grounds
- Stop 5: Magere Brug
- Stop 6: Nieuwe Kerk
- Stop 7: Blauwbrug
- Stop 8: Nieuwmarkt
- Stop 9: Huis Bartolotti (Museumhuis Bartolotti)
- Daytime vs Evening: Why Light Is the Real Instructor
- What the Photographer Guide Does Differently
- Quick Wins You Can Use the Same Day
- Who This Tour Fits Best (and Who Might Want Something Else)
- Price and Logistics, Straight Talk
- Should You Book This Amsterdam Photography Lesson?
- FAQ
- How long is the Amsterdam Photography Masterclass?
- Is this tour private?
- What is the maximum group size?
- Do I need a camera?
- Does the tour include a tripod?
- Are meals and drinks included?
- Is the tour offered in English?
- Where does the tour start and end?
- Does it run in bad weather?
- What is the cancellation policy?
Key Highlights You’ll Feel Right Away
- Private, small-group lesson with a photographer guide, max 4 people per booking
- DSLR-focused tips that help you change settings quickly, not just take guesses
- Daytime and evening options so you can practice in real light conditions
- Iconic stops in one route including Leidsegracht, Magere Brug, and the Rijksmuseum area
- Free admission at each shooting stop (so you are not paying extra to learn)
More Amsterdam trips with just your group
- Rijksmuseum Amsterdam Small-Group Tour with Private Upgrade★ 4.5 · 1,547 reviews
- Van Gogh Museum Tour Reserved Entry Semi Private★ 5.0 · 1,437 reviews
- Private Amsterdam Red Light District and Coffee Shop Tour★ 5.0 · 763 reviews
- Anne Frank and Jewish Quarter Amsterdam Private Walking Tour★ 5.0 · 684 reviews
A Private Photo Lesson Through Amsterdam’s Best Corners
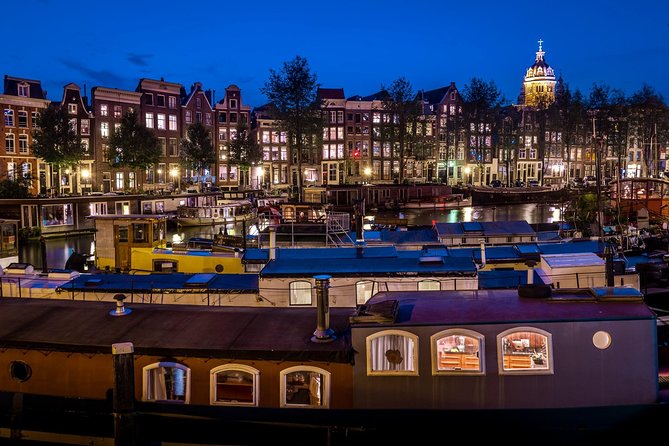
Amsterdam is made for cameras. The canals give you repeating lines. The bridges give you instant compositions. And the streets? They are busy, photogenic, and full of small details you might miss if you are just sightseeing.
This masterclass works because it blends city touring with actual shooting instruction. You are not wandering alone with a checklist. You have a pro photographer guide, plus a local guide, steering you to places where your pictures will look like they belong in an album, not like a phone snapshot taken at random.
I like that the pace is built for learning. Each stop is short and focused, so you can try a technique, get feedback, and move on before you start guessing again. It also means you can cover a lot of key Amsterdam sights without it feeling like a museum marathon.
You do need to show up ready. You will get the best value if you come with at least a basic grasp of your DSLR, and a willingness to shoot, check, and adjust. The lesson is not a replacement for reading a full photography book, but it is one of the quickest ways to get better while you are standing in the exact scene you want to photograph.
Price and Value: What $204.24 Buys You in Real Teaching Time
At $204.24 per person for about 3 hours, this is not a cheap add-on. But it is also not trying to be one of those generic sightseeing tours with a loose photo tip at the end.
Here is the value math that matters:
- You are paying for a professional photographer guide, plus a local guide.
- It is private, and the group is limited to four people.
- The instruction is designed around actual shooting at specific spots, not just walking and talking.
You are also not paying extra entry fees during the route. Each planned shooting stop lists free admission. That matters in Amsterdam, where ticket costs and timed entry can quietly add up during a day out.
The main cost trade-off is what is not included. Food and drinks are not included, and your camera is not provided. You do need your own DSLR. If you are traveling with a DSLR already, the price feels much more reasonable. If you were hoping the tour would supply gear, you will want to plan for that before booking.
What to Bring, What to Expect, and How to Not Get Frustrated
The tour asks you to bring your own DSLR camera. That is the big gear requirement. A tripod is listed as available upon request, so if you use one, ask ahead or bring it if you have room. If you are thinking about low-light or evening shots, a tripod can help, but it is not mandatory based on the info provided.
You also want to dress for real weather. The lesson runs in all weather conditions, so bring a jacket that can handle rain or wind. Amsterdam weather can change fast, and a photography session can feel twice as long when you are cold.
One practical note: it is mobile-ticket friendly and near public transportation. The meeting point is Leidsekade 97, 1017 PN Amsterdam, and the tour returns back to that same meeting point. That makes it easier to plan the rest of your day, especially if you have dinner reservations later.
Language is English, and you should confirm the departure time based on the selected date. Timing affects light, and light affects every camera setting you will practice.
The Route: Nine Stops Where You Learn to Shoot, Not Just Look
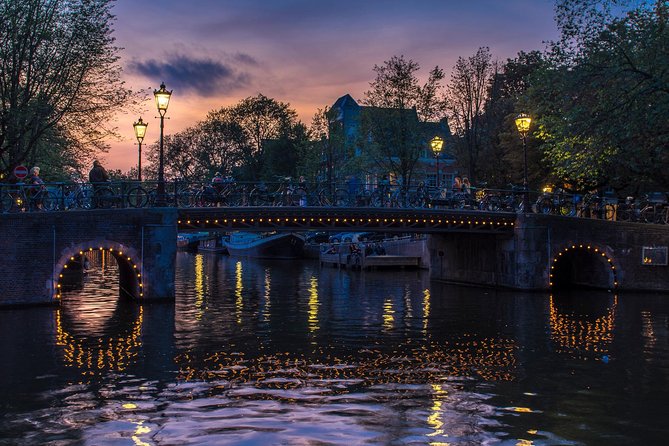
Each location on the route is a chance to practice a specific kind of photo. You will typically get around 20 minutes per stop, which is enough time to try something, revise it, and still move on.
The stops are also chosen because Amsterdam repeats visual themes: bridges, canals, historic facades, and that classic Dutch mix of water-level reflections and tall architecture.
More Amsterdam bookings built around the camera

Stop 1: Statue Amsterdams Lieverdje
This is a fun way to start because it helps you get comfortable shooting quickly. A small subject can force you to nail framing and focus, instead of letting the scene size do the work for you. You’ll likely practice how to hold your camera steady and how to fill the frame with intention, not by accident.
Why it is worth your time: it is a low-stress warm-up for composition.
Possible drawback: if you are already an advanced photographer, you may feel you are moving fast here.
Stop 2: Voetboogstraat (and a close-by alley vibe)
This stretch gives you street-level textures and the kind of geometry that makes photos feel dynamic. The goal is often to use lines and perspective so your image looks deeper than it does with a quick glance.
Why it is worth your time: it teaches you to shoot streets like a subject.
Watch for: changing light and moving people, since central streets always have motion.
Stop 3: Leidsegracht Bridges
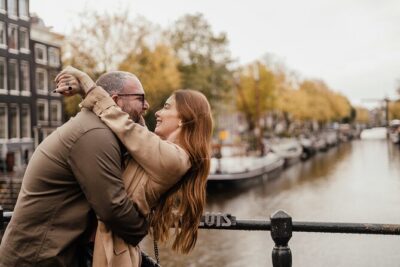
Bridges are a gift because they create leading lines and natural symmetry, even when the canal itself looks busy. You will practice angles that make the water and bridge cables look intentional, not random.
Why it is worth your time: you learn bridge photography in the real place, not in theory.
Possible drawback: crowds can appear here, so you may need to be flexible with your timing.
Stop 4: Rijksmuseum and Grounds
This stop gives you scale. The Rijksmuseum area is perfect for learning how to photograph big buildings without making them look like a flattened postcard. You can practice how to stand far enough back, how to tilt less, and how to frame the facade so it looks strong.
Why it is worth your time: it pushes you beyond small details into full-scene composition.
Watch for: wide shots can require different settings than close-ups, so you will want to follow your guide’s directions.
Stop 5: Magere Brug
This bridge is one of Amsterdam’s most photographed. It is also one of the easiest places to go wrong if you rely on default settings. The water reflects light and the bridge creates strong shapes, so you will practice balancing exposure and managing reflections.
Why it is worth your time: it is ideal for learning how reflections change your results.
Possible drawback: in evening conditions, it gets more challenging, and you will want a plan for steady shots.
Stop 6: Nieuwe Kerk
Church architecture usually means high contrast, tall lines, and tricky angles. You will likely work on capturing vertical structures while keeping the image from looking like the building is falling away.
Why it is worth your time: it trains you to control perspective.
Watch for: lighting can vary as you shift position, so re-check settings quickly.
Stop 7: Blauwbrug
This bridge is another perspective lesson. Smaller bridges can be powerful because they let you combine water, stone, and the lines of the railing into one frame.
Why it is worth your time: it helps you practice framing with a simpler visual structure.
Possible drawback: the setting can look similar to other bridges, so you should ask your guide what changes in your composition and why.
Stop 8: Nieuwmarkt
Nieuwmarkt gives you another flavor of Amsterdam, a busier square area with architecture and street activity. This is where your guide’s pacing helps, because you need to learn how to shoot through movement without losing your subject.
Why it is worth your time: it adds a street-documentary angle to the route.
Watch for: if you are too focused on getting a perfect shot, you can miss the moment. A lesson helps here.
Stop 9: Huis Bartolotti (Museumhuis Bartolotti)
This is a classic Amsterdam facade stop. Details matter. The idea is to learn how to photograph ornate architecture without overexposing bright highlights or turning shadows into muddy blocks.
Why it is worth your time: it gives you close-to-mid framing practice.
Possible drawback: details can encourage over-shooting. Use your guide’s feedback to choose the best take.
Daytime vs Evening: Why Light Is the Real Instructor
You can choose between daytime and evening tours, and that is not just a scheduling option. It changes the whole teaching session because your camera behaves differently at night.
During evening shooting, you deal with lower light, higher contrast, and often slower shutter speeds. That means you may need steadier technique and settings that keep your subject from turning into blur.
One review highlight connects to this directly. Renzo, for example, helped a student get serious about night photos when they had not been successful before. The big takeaway is not magic gear. It is learning how to set up for low light, then practicing until your results match what you were aiming for.
If you are nervous about evening, you are not alone. This type of private lesson is useful because the photographer guide can spot what is going wrong in your shots and correct it fast, instead of letting you troubleshoot all night on your own.
What the Photographer Guide Does Differently
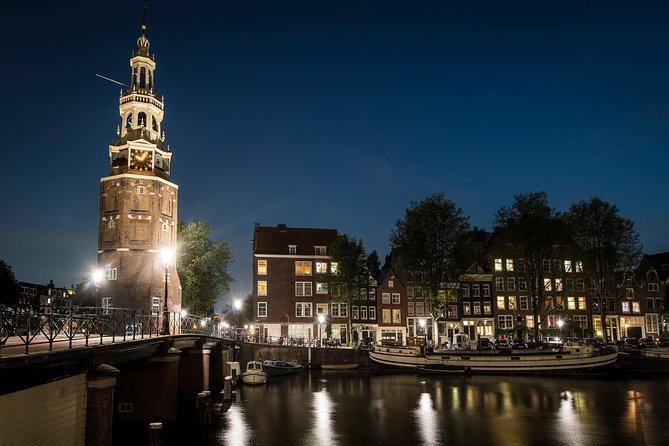
There is a big difference between someone who says, try this angle, and someone who helps you understand the why.
The most praised part of this experience is the teaching itself. People liked how guides took time to explain camera settings, not just where to stand. They also liked that the guide can tailor the tour to the kind of photos you want, whether that means night shots, bridges, architecture, or more general city storytelling.
Another review theme is that the instruction gives you practical tips you do not get from books. That is because you are learning while the environment is happening around you. You can test the advice immediately, see the effect, then adjust.
Guides named in the feedback include Renzo and William. Both are described as polite, patient, and skilled at turning a student’s frustration into real results, including better night photos and stronger compositions. Even if you start with a camera you think you already know, this kind of lesson often reveals settings you rarely touch until you need them.
Quick Wins You Can Use the Same Day
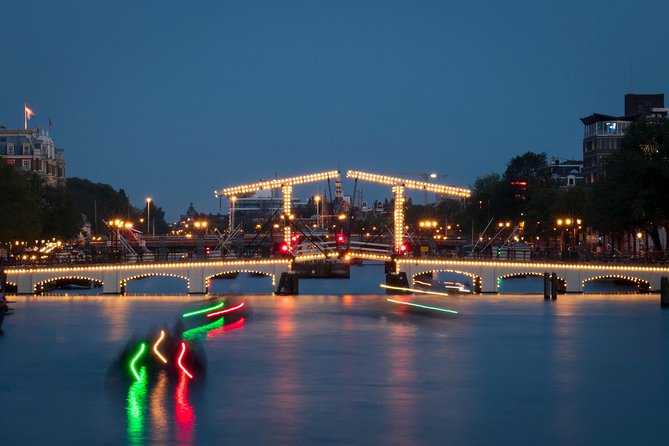
You will get better faster if you bring a simple goal. You do not need to memorize photography theory. Instead, pick one thing to improve on each stop.
Here are practical goals that match how this route is set up:
- Improve one composition habit: fill the frame, use the bridge as a leading line, or align verticals at the church stop.
- Use one setting focus: exposure first in bright scenes, then shutter or ISO when light drops.
- Shoot, check, repeat: after each feedback moment, take a new set of shots immediately.
Because the stops are scheduled and time is limited, the tour style pushes you to iterate. That is the habit that helps you improve fast during your trip, even if you have limited days in Amsterdam.
Who This Tour Fits Best (and Who Might Want Something Else)
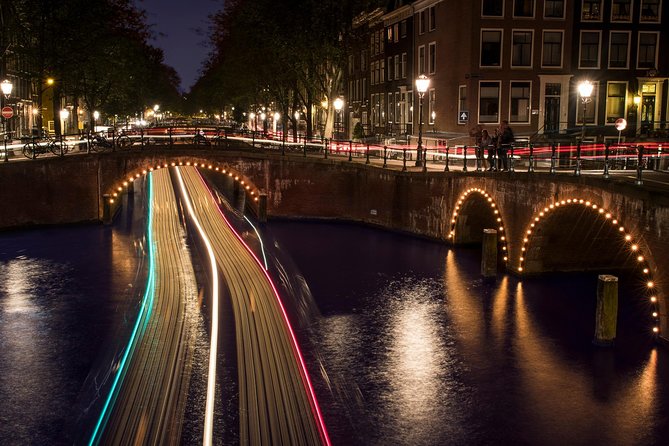
This masterclass suits you if you:
- Have a DSLR and want to learn faster with a pro beside you
- Want to photograph Amsterdam landmarks and canals, not just stroll
- Prefer a private experience with up to four people
- Are interested in learning how to shoot in different light, including evening
It is especially good if you feel stuck with your camera. One of the strongest review themes is that the guide helps you discover what your camera can do, and gives you setting guidance you can apply immediately.
You might look for a different style of tour if you:
- Have no DSLR and were hoping the tour supplies equipment
- Hate walking or prefer long museum-style time at one location
- Expect a talk-only lecture with no active shooting
Price and Logistics, Straight Talk
You are starting at Leidsekade 97 and ending back at the same spot, which helps with planning dinner or other museum visits afterward. It is near public transport, so you are not stuck in the middle of nowhere.
The tour runs in all weather. That is good because it protects your plans, but you need to dress appropriately and not treat rain as a reason to stop learning.
The group limit is small, and it is truly private. That makes the instruction feel more personal and keeps the feedback focused instead of delayed.
If you like structure, you will enjoy this. If you like complete freedom to roam, you might find the fixed route a little too guided. Still, the stop-by-stop approach is exactly why people leave with stronger photos.
Should You Book This Amsterdam Photography Lesson?
If you want a practical way to get better photographs in a short Amsterdam trip, I think this is a smart booking. You are paying for professional, hands-on instruction tied to a route built around iconic subjects. And the best part is not just shooting famous places. It is learning camera settings that match what you see in front of you.
Book it if:
- You have a DSLR already
- You want daytime and evening practice
- You value feedback and want to correct mistakes quickly
Skip it if:
- You are not bringing a DSLR or you cannot shoot at street level
- You want a free-form walking tour with no teaching focus
If your goal is better photos before you fly home, this kind of guided practice is one of the fastest ways to get there.
FAQ
How long is the Amsterdam Photography Masterclass?
It lasts about 3 hours.
Is this tour private?
Yes. It is a private tour, and only your group participates.
What is the maximum group size?
The booking allows a maximum of 4 people.
Do I need a camera?
Yes. You should bring your own DSLR camera. Camera rental or supply is not included.
Does the tour include a tripod?
A tripod is available upon request, but it is not listed as included automatically.
Are meals and drinks included?
No. Food and drinks are not included.
Is the tour offered in English?
Yes, the tour is offered in English.
Where does the tour start and end?
It starts at Leidsekade 97, 1017 PN Amsterdam, and ends back at the meeting point.
Does it run in bad weather?
Yes. It operates in all weather conditions, so you should dress appropriately.
What is the cancellation policy?
You can cancel for a full refund up to 24 hours in advance of the experience start time. If you cancel less than 24 hours before, the amount paid is not refunded.
Bookings Where the Camera Comes First
Nobody Else on the Booking



Also Reviewed Around Amsterdam



Fresh off the review pile in Amsterdam
- Full-Day Trip From Amsterdam to Keukenhof, Zaanse Schans + Cruise
★ 5.0 · 3 reviews - Boutique Dutch Food & History Tour with up to 8 guests only
★ 5.0 · 3 reviews - Private Tour to Windmills Zaanse Schans +Keukenhof – 7 Hours
★ 5.0 · 3 reviews - Full-Day Private Guided Countryside Tour from Amsterdam by Bike
★ 5.0 · 3 reviews - Amsterdam Red Light District and Old Town Walking Tour
★ 5.0 · 3 reviews
Workshops, compared.
 ★ 4.8Amsterdam: Traditional Dutch Syrup Waffle Making WorkshopFrom $234,093 reviews
★ 5.0Amsterdam Traditional Dutch Syrup Waffle Making WorkshopFrom $27960 reviews
 ★ 4.8Amsterdam: Bols Cocktail Experience and Cocktail WorkshopFrom $41666 reviews
 ★ 4.5Amsterdam: 3-Course Meal in Historic 1st Class Waiting RoomsFrom $61292 reviews
 ★ 4.7The Hague: Beginner’s Surf LessonFrom $4578 reviews
 ★ 5.0Amsterdam Light Festival Winter Walk with Stroopwafel Workshop66 reviews
 ★ 5.0Distilling Class @ Spirited Union Rum Co. (Amsterdam)From $9665 reviews
 ★ 5.0Cocktail workshop @ Spirited Union Rum Co. (Amsterdam)From $5458 reviews
Browse the lists this tour appears in